Last Friday I saw a great post on using our retired DSP as the card base folding it so that you see both designs inside and outside the card (thanks Jessica at Stamp a Blessing). I thought it was a brilliant way to use all my retired DSP for beautiful cards. And boy do I have lots of retired DSP that I’ve hoarded. At the same time, Friday’s SGGW weekend challenge was posted. I looked, and thought and looked again, hmm…I decided I could use Jessica’s idea for this template!
I pulled one of my retired Christmas papers that I didn’t care if I failed terribly! First I cut a piece of typing paper to try to figure out how it would work and the dimensions I would need to fit into one of our regular envelopes. And much to my delight…it worked! Here’s the outside of my card. It only uses the DSP for the card base, no cardstock.
 When I was finished I decided the Christmas paper really works as a birthday card with the added Crushed Curry accents. Here’s the inside. I love seeing the polka dot pattern on the entire inside since it focuses your attention immediately on the sentiment. The outer circles overlay directly over this inner greeting circle so you don’t see it when the card is closed.

WooHoo, I’m so excited this idea worked, now off to create more TY and BD cards with more of my retired DSP sitting on my crafting table!! Once I finish those ideas, I’ll switch over to use my new Stampin’ Up! DSP to create a few cards for my classes! I’ll post my creations later this week and next!!
Here’s how I cut the card:
- Cut a 12″ x 12″ DSP into 4″ wide pieces, a little narrower than our usual 4-1/4″ cards so that I could get 4 card bases out of the entire sheet.
- I cut off 1-1/2″ piece off so that I had a 4″ x 10-1/2″ strip for my card base
- Score the paper at 5-1/2″ (our usual card size) and fold. The front is shorter than the back. (Be sure to look at your pattern. If you have flowers or something that has a right side up and a upside down view, make sure you score it so that when it’s folded you are seeing the design on the front right-side up. It didn’t matter with this card, but see tomorrow’s card and you’ll understand the process.)
- I drew a diagonal line from the one lower lefthand front corner to about 3/4″ from the top edge, then cut that piece off to get the diagonal on the front (save that piece for one of your circles on the front!)
- I used my Stitched Shapes largest circle to cut the Crushed Curry and Whisper White (inside greeting),
- I used the Layering Circle framelits to cut the Real Red scallop and a circle from the diagonal piece I cut off (don’t waste those scraps!)
- Stamped my greetings inside and out, layered the front circles and attached to the front. Make sure you only put adhesive on the upper part for the front so it doesn’t stick to the inside!
- I used temporary adhesive to attach the font of the Whisper White greeting circle to the back of the front circle on the inside of the card. Then I applied permanent adhesive to the white circle’s back, closed my card to adhere the circle to the inside. Be sure to brush off the temporary adhesive once you open your card.
- Sounds complicated, but it really isn’t!
Here’s what you’ll need for this card:
- a 12×12 piece of your favorite Stampin’ Up! DSP (makes 4 cards!), 3-1/4″ squares of matching cardstock colors for the circles, matching inks for your greetings and:
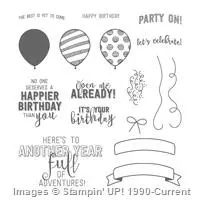


I think I have to put my Balloon Adventures stamp set aside and try some of my other new stamp sets!! But I love Balloon Adventures and keep coming back to it again and agin. Thanks for joining me today on this creative fold adventure! I hope it inspires you to try this ideas with some of your beautiful Stampin’ Up! DSP!
Cute! I wold never have thought that was Christmas paper if you hadn’t said! 🙂
I know, I was just playing around with the idea. And when I saw it, I thought if I added a 3rd color I could really use it for a BD card!