As I said yesterday I love decorating for the holidays, to a certain degree. I have boxes and boxes of things to decorate for the fall, Halloween, Thanksgiving and Christmas. But digging it out, ah…that’s the thing I definitely don’t like. Now that I have the wreath for home, I knew I needed to get out my office decorations (I’m a researcher at “real” job).
Last year as I was contemplating my office fall decorations I remembered a Fall decorating kit I had purchased on sale many years ago before I started Stampin’ Up! It had a paper pumpkin made of paper strips that you put together. I dug it out to see how they did it. WOW…was it ever simple! A series of 2″ x 12″ strips of wonderful fall papers. And I knew just where to get those – my collection of beautiful Stampin’ Up! fall designer papers. It was so easy that I not only made myself one, I also made all my office co-workers a personalized Fall Pumpkin for their desks! It’s hard to tell in the picture but it’s about 10″ in diameter and about 7-8″ tall.

Here’s how to make your own version! Collect various fall papers (Stampin’ Up! has some beautiful ones, and some retired ones if you still have leftovers) and lay them out to create a pleasing combination until your are satisfied with the arrangement. Cut 14-16 strips of 2″ x 12″ strips and layer them together in the color arrangement that you like.
Then punch a small hole at the top and bottom about 1″ in from the edge along the 2″ sides. Push an old fashioned, large paper brad through the hole of all 14-16 strips, both top and bottom. Open the ends and flatten the brads. The flatten part of the brad goes on the “inside” of the pumpkin.

Add several stamped leaves using the new Vintage Leaves stamp set and Leaflet framelits (order as a bundle to save 15%), with a thin piece of wire (I used copper wire I’ve had forever). When you are finished carefully pull each strip out and fan it around to create a pumpkin shape. Below are several pictures showing several stages as I pulled the strips around to form the pumpkin.


See the first picture for my finished pumpkin sitting on my desk.
When the fall holidays are over and you are ready for Christmas, just reverse the process and carefully push each strip back under the other ones until it looks like the flat strips above so it stores flat until next fall! Enjoy. On, a FYI – I also put a short, pint mason jar in the middle before I finished pulling all the strips around to give it more weight and to keep it standing up. With all the ribbon and leaves on top I found it started to sag and become a “squashed” pumpkin!
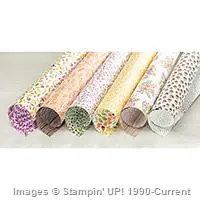
Here’s the current “Into the Woods” fall paper from Stampin’ Up! that would make a great pumpkin.
Built for Free Using: My Stampin Blog
Leave a Reply