For those of you who know me well, that’s an earth-shattering statement. I’ve avoided the Stampin’ Up! stamp sets that needed to be colored because I never felt I could create the beautiful images that others were making. I did buy the new Stampin’ Up! watercolor pencils recently. I’m still hesitant, but I thought I’d try them after seeing others demonstrate them. BTW – I sold my retired Stampin’ Up! tin box of watercolor pencils back in 2014 to a friend since I never used them – I told you I didn’t think I could color!
So why am I now in love with coloring? I attended Stampin’ Up! OnTour 2021 last weekend. I created a set of cards with one of the new stamp set to share with the group. I loved the card example in the catalog, but it was colored. UGH! But I challenged myself to try it. I pulled out my current watercolor pencils. I stamped the big image and used my Melon Mambo and Granny Apple Green watercolor pencils and literally scribbled the color over the image. I used my blender pen to smooth the colors and WOW…I did it! I also colored the butterflies from the set then fussy cut them out. I call this my “simple stamper” card.

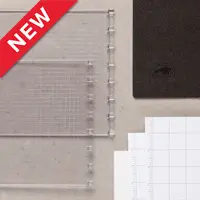
For my next card I decide to create a stepped-up version for the casual stamper. On this card I got a little more adventurous and used my stamp pads to create the color of the main image. To do that I had to cut apart my stamp – gasp! No I didn’t destroy it, just carefully cut the top piece off the bottom piece. To make sure everything lined up on the finished card, I used my Stamparatus. If you don’t have one, you should really consider one! It makes stamping your images incredibly easy and you get them stamped exactly where you want. And if the image has spots that didn’t get inked enought, just reink and restamp! Granted it took several tries on scrap paper to get it lined up, but once that was done, I could stamp to my heart delight! I made the same butterflies, but this time use the Calypso Coral pencil for one of them.

One more card, but this time for the avid stamper with more things and bling! I added a layer that was dry embossed with my Painted Textures folder. It’s hard to see in the picture, but looks nice in person. I added some linen thread and a bow underneath my greeting tag. Now that I’m seeing all of these I will go back and add some of the Holiday Rhinestone basic jewels for some added sparkle.

Although you can’t purchase this stamp set yet, you should get the watercolored pencils! Try them, it’s so easy! And that’s coming from a “non-colorer!” Get the watercolor pencils and the blender pens below! I also included the Stamparaus, an incredible tool for your stamping room!


I hope I’ve inspired you fellow non-colorers! And, even if you like coloring, try the watercolor pencils and blender pen! I think you’ll enjoy using them and the effects you can create! After making these cards and getting a lot of “ohs” and “ahs”, I was inspired to create more hand-colored cards! I expanded my coloring skills on my Dragonfly Garden stamps! I’ll post those cards on Monday.
Thanks for stopping by today. If you don’t have a demonstrator, I’d love to be yours. Just hop over to my site to shop. Hugs to all of you, and happy stamping!

Leave a Reply